
This is a sample project showcasing my skills in building an ETL (Extract, Transform, Load) pipeline for data processing. It demonstrates my ability to design and implement a robust workflow using popular tools and technologies.
Please note that you can find the complete project, including all docker, terraform, sql and python files on my GitHub:
https://github.com/falkzeh/etl-challenge
The solution presented here was initially developed as part of a challenge and has been modified to remove any references to the specific challenge or associated company. By focusing on the technical aspects and removing company-specific information, this project serves as a general example of my coding skills and proficiency in handling data processing tasks.
Data Source
For this example I’m using the Covid-19 Datasets of Our World in Data: Covid-19 Data
Infrastructure Setup
To tackle this challenge I decided to use Airflow as a workflow manager. I have used it in the past and I think it is a great tool for this kind of task. I have also used Docker to make the setup easier. For the database I decided to go with MySQL on AWS because it is a service that I am familiar with and it is easy to setup. For the deployment I used terraform in order to have a reproducible infrastructure, versioning and to be able to scale it easily if needed (Plus I can be sure to delete everything without being charged after the challenge is completed).
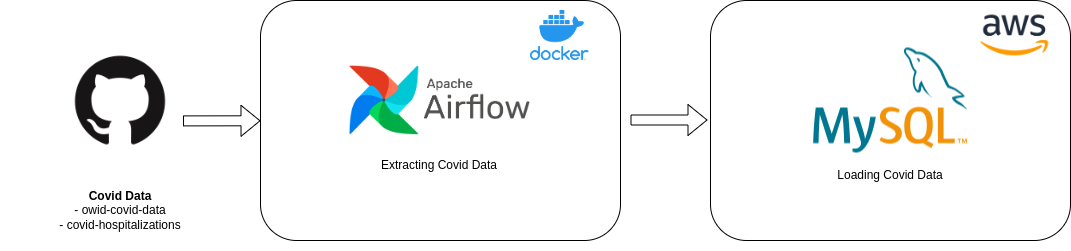
Airflow
In order to get started you create a virtual environment and install the requirements.
python3 -m venv venv
source venv/bin/activate
pip install -r requirements.txt
Then you start the Airflow server with docker compose (if you haven't installed docker compose you can find more information here).
Please note that I had to create a custom Airflow image in order to install some additional packages such as the mysql client or python-dotenv. You can find the Dockerfile in the airflow folder.
cd airflow
docker-compose build
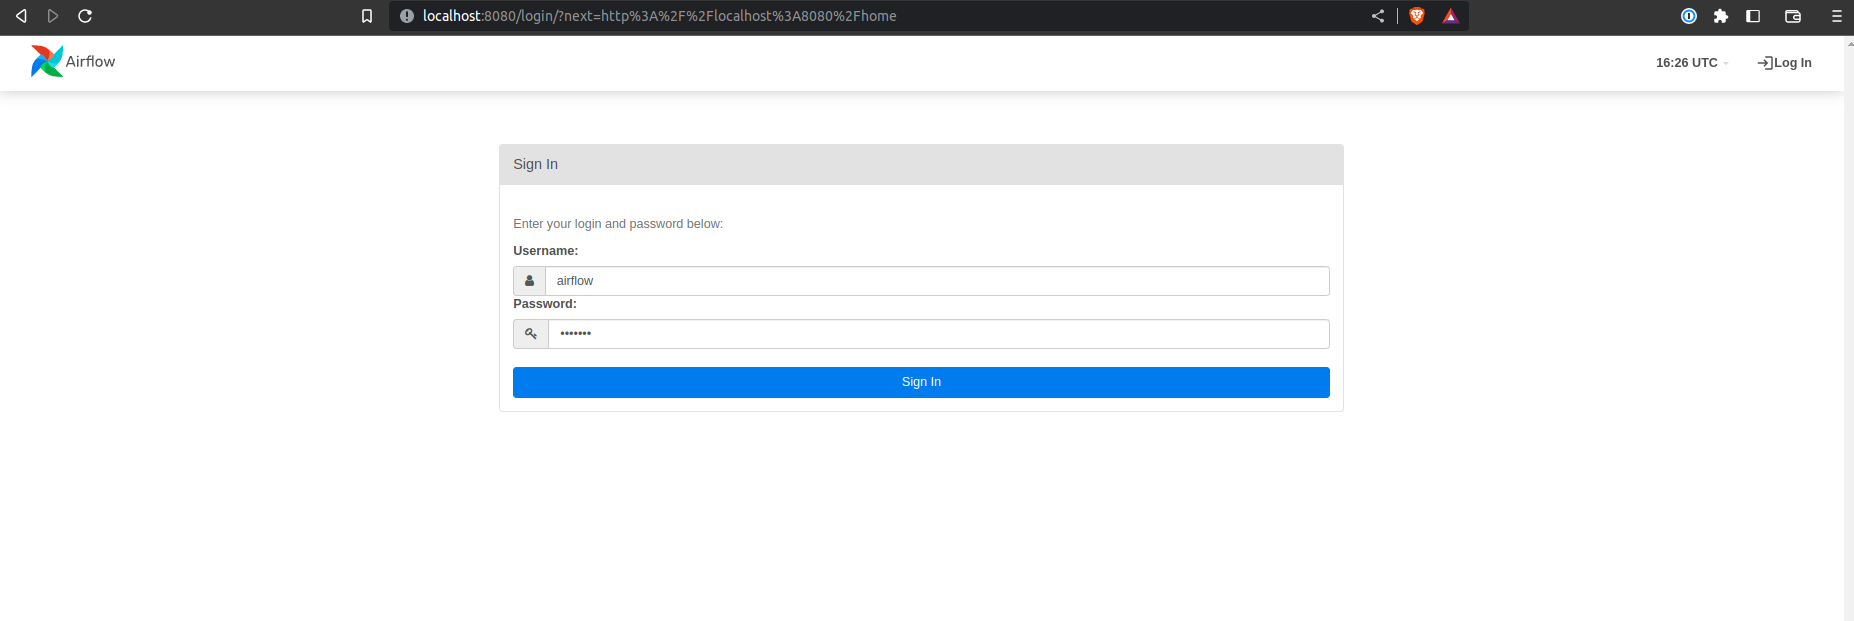
docker-compose up -dYou can access the UI at
(username and password are both 'airflow'). We can see that the server is running and that the DAG is paused.
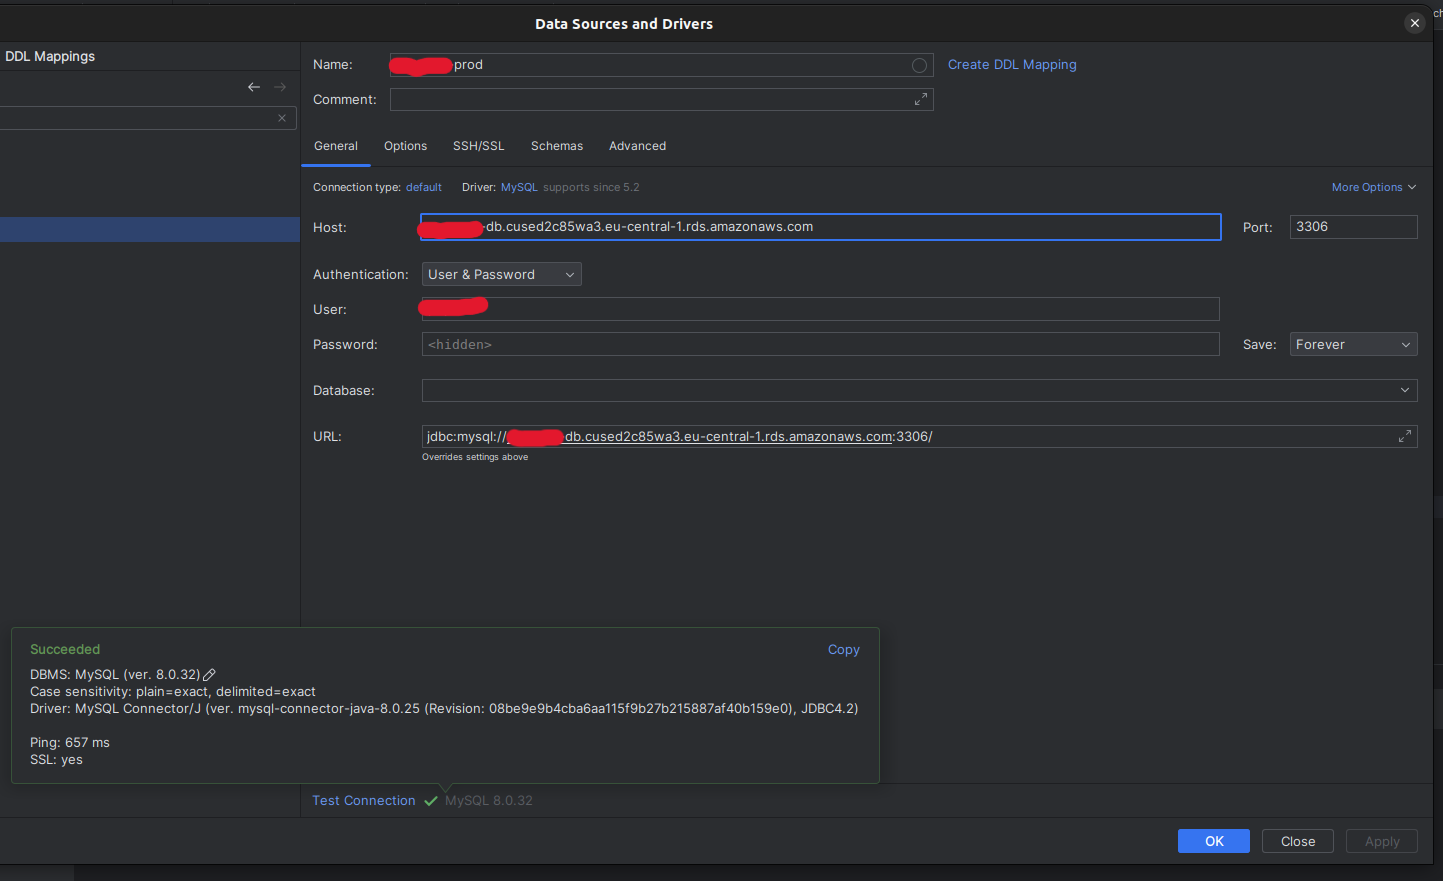
MySQL
You can find the terraform files used to create the RDS here:
In order to access the MySQL database you can use the credentials stored in the
.envfile. If you're for example using DataGrip you can create a new connection and it should look like this:
The two tables are in the database:
select * from owid_covid_data limit 5;
select * from covid_hospitalizations limit 5;
Explaining the Code
You can find the full code in the airflow/dags folder. I will explain the code function by function. Please not that I would normally add the .env file to the .gitignore file but I left it in for the sake of this challenge.
extract.py
First, I initialize the MyChallenge class with the url to the csv file and the database credentials. I also set the default values for the date column and the table name. I use the load_dotenv() function to load the credentials from the .env file. I also set the logging level to INFO so that we can see the logs in the Airflow UI.
load_dotenv()
logging.basicConfig(level=logging.INFO)

class MyChallenge:
    def __init__(
        self,
        url: str,
        date_column: str = "date",
        table_name: str = None,
        db_user: str = os.getenv("MYSQL_USER"),
        db_password: str = os.getenv("MYSQL_PW"),
        db_host: str = os.getenv("MYSQL_HOST"),
        db_database: str = os.getenv("MYSQL_DB"),
    ) -> None:
        """
        Initialize MyChallenge class with MySQL database credentials and url to csv file.

        Args:
            url (str): url to csv file
            date_column (str): name of date column for data validation. Defaults to "date".
            table_name (str): name of table in database. Defaults to None.
            db_user (str, optional): database user. Defaults to os.getenv("MYSQL_USER").
            db_password (str, optional): database password. Defaults to os.getenv("MYSQL_PW").
            db_host (str, optional): database host. Defaults to os.getenv("MYSQL_HOST").
            db_database (str, optional): database name. Defaults to os.getenv("MYSQL_DB").
        """
        self.url = url
        self.date_column = date_column
        self.table_name = table_name
        self.db_user = db_user
        self.db_password = db_password
        self.db_host = db_host
        self.db_database = db_database
A table_name can be provided as an argument to the class. If no table name is provided, the get_table_name() function will be called to get the table name from the url. The function will remove the extension and replace the dashes with underscores. For example, the url https://covid.ourworldindata.org/data/owid-covid-data.csv will result in the table name owid_covid_data.
def get_table_name(self, url):
    """
    Get table name from url in case no table name is provided.

    Args:
        url (str): url to csv file

    Returns:
        table_name (str): name of table in database
    """
    if self.table_name:
        return self.table_name

    path = urlparse(url).path
    filename = path.split("/")[-1]
    name_without_extension = filename.replace(".csv", "")
    table_name = name_without_extension.replace("-", "_")
    return table_name
The next function is get_csv_data(). It takes the url as an argument, uses the requests package to get the data and returns a pandas dataframe. It also adds the current time and the source url to the dataframe. This will be useful later for tracking and process monitoring.
def get_csv_data(self, url) -> pd.DataFrame:
    """
    Get csv data from url and return a pandas dataframe including the loadtime and source url.

    Args:
        url (str): url to csv file

    Returns:
        df (pd.DataFrame): pandas dataframe
    """
    logging.info(f"Getting data from {url}")
    response = requests.get(url)
    csv_content = StringIO(response.text)
    df = pd.read_csv(csv_content)
    df["LOADTIME"] = dt.datetime.now()
    df["SOURCE"] = url
    logging.info(f"Data from {url} successfully loaded into dataframe")
    return df
Next, we establish a connection to the database using the get_engine() function.
def get_engine(self):
    """
    Get database engine.

    Returns:
        engine (sqlalchemy.engine): sqlalchemy engine
    """
    logging.info("Getting database engine")
    url = f"mysql+pymysql://{self.db_user}:{self.db_password}@{self.db_host}:3306/{self.db_database}"
    logging.info("Database engine successfully loaded")
    return create_engine(url)
For data validation (Task 2) I decided to implement a function that checks if the latest date in the dataframe is not older than two days. If the data is older than two days, the function will return False and the DAG will fail. If the data is valid, the function will return True and the DAG will continue. The function will also log the result of the validation. The amount of days can and should be changed depending on the use case.
I already heard that you are using dbt as well which I have made
great experiences with. In this case I think it would make sense
to set up freshness checks and build the model incrementally.
def validate_data(self, df: pd.DataFrame) -> bool:
    """
    Validate the data quality and availability.

    Args:
        df (pd.DataFrame): pandas dataframe

    Returns:
        bool: True if data is valid, False otherwise
    """
    threshold = dt.timedelta(days=2)
    df[self.date_column] = pd.to_datetime(df[self.date_column])
    latest_date = df[self.date_column].max()
    if (dt.datetime.now() - latest_date) > threshold:
        logging.error("Data validation failed: Data is outdated")
        return False

    logging.info("Data validation passed")
    return True
Finally, the execute() function will be called by the DAG. It will call the functions described above and load the data into the database. The if_exists parameter is set to replace to make sure that the table always represents the latest version of the dataset. As mentioned above I think it would make sense to build a dbt model on top of it which can be configured incrementally. The chunksize parameter is set to 5000 to avoid memory issues when loading large datasets.
def execute(self):
    """
    Execute the ETL process.
    """
    engine = self.get_engine()
    table_name = self.get_table_name(self.url)
    df = self.get_csv_data(self.url)

    if not self.validate_data(df):
        logging.error("Data validation failed. ETL process aborted.")
        return

    with engine.connect() as conn:
        df.to_sql(
            name=table_name,
            con=conn,
            if_exists="replace",
            index=False,
            chunksize=5000,
        )
        conn.close()
        logging.info(
            f"Data from {self.url} successfully loaded into table {table_name}"
        )
pipeline.py
The pipeline.py file contains the DAG definition. The PopcoreChallenge class is instantiated with the url to the csv file. The execute() function is called to load the data into the database.
from datetime import datetime, timedelta
from airflow import DAG
from airflow.operators.python_operator import PythonOperator
from extract import MyChallenge
def run_my_challenge(url: str):
etl = MyChallenge(url=url)
etl.execute()
default_args = {
"owner": "airflow",
"depends_on_past": False,
"start_date": datetime(2023, 4, 27),
"email_on_failure": False,
"email_on_retry": False,
"retries": 1,
"retry_delay": timedelta(minutes=5),
}
dag = DAG(
"my_challenge",
default_args=default_args,
description="A DAG to run MyChallenge",
schedule_interval=timedelta(days=1),
catchup=False,
)
owid_covid_data = PythonOperator(
task_id="owid_covid_data",
python_callable=run_my_challenge,
op_args=["<https://covid.ourworldindata.org/data/owid-covid-data.csv>"],
dag=dag,
)
covid_hospitalizations = PythonOperator(
task_id="covid_hospitalizations",
python_callable=run_my_challenge,
op_args=["<https://raw.githubusercontent.com/owid/covid-19-data/master/public/data/hospitalizations/covid-hospitalizations.csv>"],
dag=dag,
)
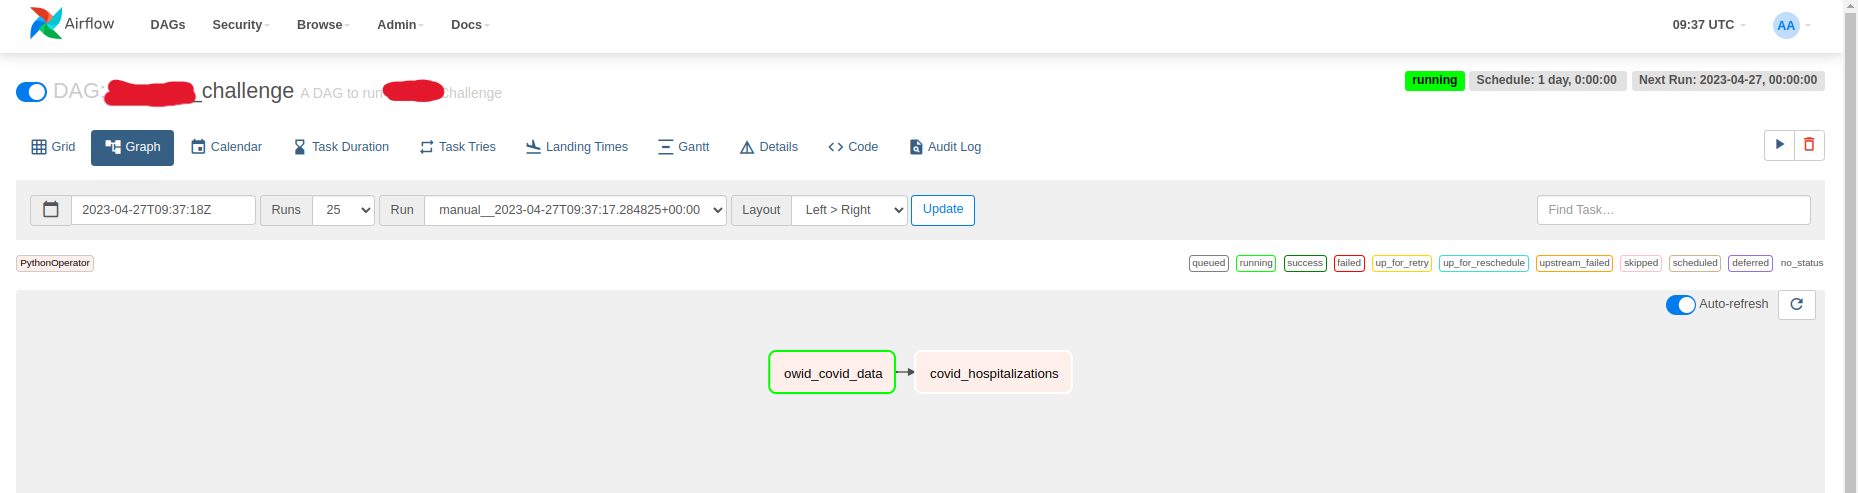
owid_covid_data >> covid_hospitalizationsIn the Airflow UI you can see the DAG and the tasks. The owid_covid_datatask is scheduled to run first and the covid_hospitalizationstask is scheduled to run after the owid_covid_datatask has finished successfully.
Bringing the sets together
Combining the two sets could either be done via SQL in e.g. dbt:
select *
from owid_covid_data covid_data
left join covid_hospitalizations hospitalizations
       on covid_data.date = hospitalizations.date
      and covid_data.iso_code = hospitalizations.iso_code
      and covid_data.location = hospitalizations.entity;
Or via pandas within the DAG:
import pandas as pd

df = pd.merge(
    left=owid_covid_data,
    right=covid_hospitalizations,
    how="left",
    left_on=["date", "iso_code", "location"],
)
Eventhough my preference would probably be the dbt approach since it is more transparent and easier to maintain, I also see value in the pandas approach because it is more flexible since you can easily change the join type and the join columns. The dbt approach would require you to change the SQL query.